How To Uninstall A Windows Store Apps With Only One Script
Today we will share a ready-made solution that can be applied in the work without modifications.
As you know, Microsoft decided to follow the example of Google and opened its own application market, called Windows Store. In OS distributions, starting with Windows 8, there appeared new types of applications (distribution file format – AppX), which are universal and should be launched on all devices under Windows.
- Among the pre-installed universal applications, we personally did not find anything useful, so we wrote a script that removes them all.
The solution presented here is intended for servicing Windows images 8, 8.1, 10. It can be used both for offline image files in * .wim format and for deployed (installed) system. As in my previous scripts, we use the tools of the DISM system.
- However, during the development, it was found out that with the dism command it is not possible to remove the universal applications from the installed system (online service) – only by means of PowerShell. We had to make a choice: either write the script completely on the PS or use the capabilities of the command interpreter (CMD), call the individual operations from the PS.
We chose the second option, in this connection, the presented solution consists of two files: the main script (can be saved with any name * .cmd) and an additional one (save with the name RemoveAppxes.ps1).

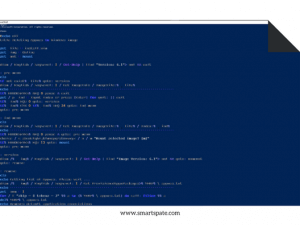
The main script
@echo off
title Deleting Appxes in Windows image

set _file=install.wim
set _img=Online
set _mnt=mount

dism /English /LogLevel:1 /Get-Help | find "Version: 6.1" > nul && exit

:pre_menu
cls
if not exist %_file% goto :version
dism /English /LogLevel:1 /Get-ImageInfo /ImageFile:%_file%
echo -------------------------------------------------------------------------------
if %ERRORLEVEL% NEQ 0 pause & exit
set /p _ind=Input index or press [Enter] for quit: || exit
if %_ind% EQU 0 goto :version
if %_ind% GTR 0 if %_ind% LEQ 24 goto :ind_menu
goto :pre_menu

:ind_menu
cls
dism /English /LogLevel:1 /Get-ImageInfo /ImageFile:%_file% /Index:%_ind%
echo -------------------------------------------------------------------------------
if %ERRORLEVEL% NEQ 0 pause & goto :pre_menu
choice /c abcdefghijklmnopqrstuvwxyz /n /m "Mount selected image? [m] "
if %ERRORLEVEL% EQU 13 goto :mount
goto :pre_menu

:version
dism /%_img% /English /LogLevel:1 /Get-Help | find "Image Version: 6.1" > nul && goto :unmount
goto :remove

:remove
cls
echo Getting list of Appxes. Please wait...
dism /%_img% /English /LogLevel:1 /Get-ProvisionedAppxPackages > %TEMP%\appxes.txt
echo -------------------------------------------------------------------------------
set _num=1
for /f "skip=8 tokens=3" %%a in (%TEMP%\appxes.txt) do call :filter %%a
del %TEMP%\appxes.txt
echo Removes default application associations
dism /%_img% /English /LogLevel:1 /Remove-DefaultAppAssociations
echo -------------------------------------------------------------------------------
if %_img%==Online (
echo Remove current Appxes for AllUsers
powershell -Command Start-Process powershell -ArgumentList '-NoProfile -WindowStyle Hidden -ExecutionPolicy Bypass -File RemoveAppxes.ps1' -Verb RunAs
)
if not exist %_file% exit
goto :unmount

:filter
echo %1 | findstr /ric:"Microsoft.*" > nul
if %ERRORLEVEL% EQU 0 call :action %1
exit /b

:action
echo %1 | findstr /ric:"Microsoft.*_" > nul
if %ERRORLEVEL% NEQ 0 (
set /a _num+=1
echo %_num% Remove: %1
) else (
dism /%_img% /English /LogLevel:1 /Remove-ProvisionedAppxPackage /PackageName:%1
echo -------------------------------------------------------------------------------
)
exit /b

:mount
cls
md %_mnt%
dism /English /LogLevel:1 /Mount-Image /ImageFile:%_file% /Index:%_ind% /MountDir:%_mnt%
if %ERRORLEVEL% NEQ 0 rd %_mnt% & pause & exit
set _img=Image:%_mnt%
goto :version

:unmount
cls
if not %_img%==Online (
dism /English /LogLevel:1 /Unmount-Image /MountDir:%_mnt% /Commit
rd %_mnt%
)
set _img=Online
goto :pre_menu
Additional script
Get-AppxPackage -AllUsers | Remove-AppxPackage
Instruction
- Two files must be located in the same folder. If there is no image file in the startup folder – install.wim, then the scripts run in fully automatic mode.
- If there is an image file in the startup folder – install.wim, the script reads information about the available “indexes” from it and suggests entering the number.
- After that, the expanded information about the selected “index” is displayed, and a mount request is issued. Pressing any key results in a return, and pressing the [m] key starts the following chain of actions: mount the image, check the OS version, remove the application distributions (in a cycle), delete all associations, uninstall the installed applications (when running online), unmount the image, return in the “index” selection menu.
- Then you can select another “index” of the image to remove the applications. The choice of “index” at number 0 starts the online service.
Parsing Code
The set command first sets the variables. You can change the expected filename of the install.wim image file (for example, to install.esd). You can change the name of the mount folder (by default mount) or specify a path if the mount folder should be outside the startup folder.
: pre_menu
The preliminary menu. Getting basic information about a wim-file with error control. If there is no image file, then start in Online mode.
: ind_menu
Index menu. Getting extended information about the selected “index” in a wim-file with error control. Proposal to mount the “index”.
: version
Check the version of the target system. If it turns out that the script is trying to apply to the image of Windows 7, then unmounting occurs. Otherwise, go to the next label.
: remove (: filter: action)
The main block for executing the script. First, a list of integrated universal applications is requested, and stored in a temporary file called appxes.txt. Then, in the for loop, rows are extracted from the resulting list and passed to the pseudo-function: filter.
The lines are filtered by the search by the regular expression “Microsoft. *” – if found, then passed to the next pseudo-function: action. Here the regular expression “Microsoft. * _” Filters out the names of the universal applications that are sent to the dism utility for deletion in the future. To better understand the logic of work, you need to look at the contents of the appxes.txt file. Since the file is deleted when the cycle is finished, it is necessary to receive and store it manually beforehand.
- One command removes all associations of opening individual files by universal applications. For common file types, there are associations with standard classic Windows applications.
Uninstalling (uninstalling) of universal applications on the installed system occurs by calling a compound command in the scripting language PowerShell. The file for the additional script, RemoveAppxes.ps1, first executes a query for a list of all universal applications for all users, and then “piped” them to the team for deletion. It seems to be nothing complicated, however, in order to perform this operation, the PS script should be started with elevated privileges, and it is not enough to work on behalf of the Administrator. To successfully run, you need to insert that complex code in the PowerShell command to get elevated privileges. The protection which is easy to manage! That’s for this “idiocy” and I did not like PowerShell.
: mount
Mounting the image. Pre-created the mount folder. Error control. The variable that specifies the image specification changes now points to the path to the stand-alone image.
: unmount
Unmount the image. If online maintenance was performed (Online), then you do not need to unmount it. Returning variables to the original values.
Conclusion
We have provided a simple and quick way to uninstall Windows Store applications. We believe that the same application cannot be equally convenient for use on a mobile device and on a PC. First of all, these platforms have different functionalities, and hence the applications required by users must provide different functionality. After working through the script several universal applications still remain, first of all, it’s the Windows Store itself, with which you can install what was deleted or something else.


